Raspberry PI SSH with keys
Install/Update SSL Client, or download directly from the homepage, start PuTTYgen.exe and follow the short steps
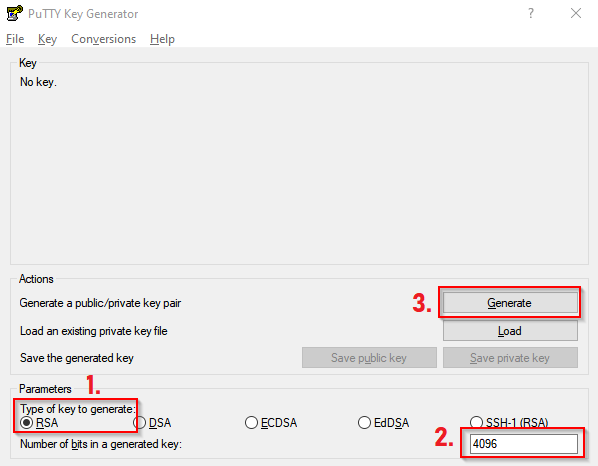
1. edit the first dialog

Set 1: Type of key to generate: RSA
Set 2: Number of bits in a generated key: 4096 (recommended in 2023)
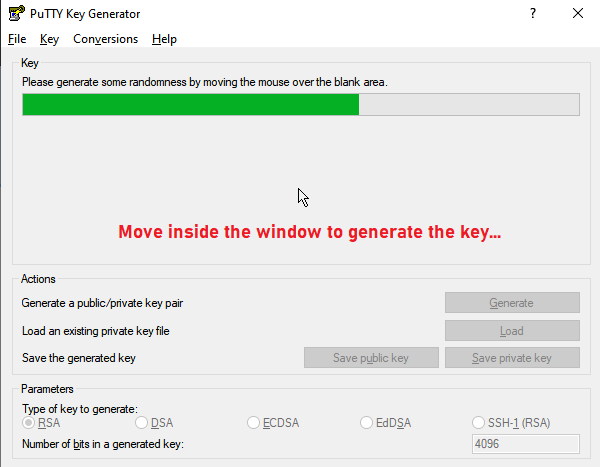
ToDo 1: Press Generate, move the mouse inside the window until the keys ready

2. edit the key dialog

- note, step 2-3 is optional
- your secret without a passphrase is a premise secret
- your secret within a passphrase is premise and knowledge secret
- remember the passphrase protect the key-pair on unauthorized useage
- if you plan to use the key-pair between a private safer pc or mac, premise secret is sufficient way
- if you plan to use the key-pair between public pc or mac, don't do that !
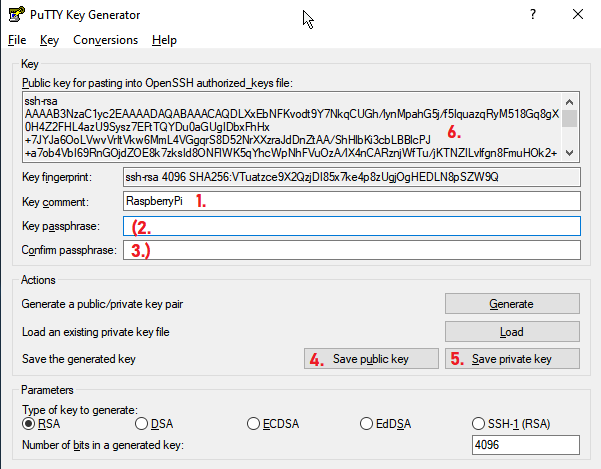
Set 1: Key Comment: use a unique name of the device, eg. RaspberryPI
Set 2: Key Passphrase: [Password]
Set 3: Confirm Passphrase: [Passwort]
ToDo 1: Save: Public Key: pubkey.ppk
ToDo 2: Save: Private Key: privkey.ppk
ToDo 3: Leave the window open, we need the public key to paste on the RPi
3. prepair the raspberry pi
open SSH to the PI4, create a the hidden dir .ssh, set some reights to protect the dir, create the file authorized_keys
mkdir .ssh
cd .ssh
touch authorized_keys
chmod 700 ~/.ssh/
chmod 600 ~/.ssh/authorized_keys
nano authorized_keys
go to the PuttyGen-Window: "Public key for pasting into..." and copy the hole string (str+a str+c)

go to the RP4 and paste the string to authorized_keys on nano
save the changes
Now, i'ts time to use putty to connect the pi with key. In case of a error, delete the .ssh dir
sudo rm -r /home/pi/.ssh
and create a new one,
goto 3. prepair the raspberry pi